How can we avoid the data science black hole of complexity, unpredictability, and disastrous failures and actually make it work for our organizations?
According to this recent Eckerson article the key is operationalizing data science:
We, as a field, and I mean academics, scientists, product developers, data scientists, consultants … everybody … need to redirect our efforts towards operationalizing data science. We as practitioners can unleash the power of data science only when we make it safe and find a way to fit it into normal business processes.
Here at Kinetica we couldn’t agree more! What’s the point of building a brilliant model if you can’t actually get it into production? That’s the problem we’re helping to solve by streamlining this machine learning (ML) operationalization process. Kinetica’s GPU-accelerated engine can easily and quickly run deep learning models in parallel across multiple machines. Our CUDA-optimized user-defined functions API, makes it simple to prepare, train and deploy predictive analytics and ML.
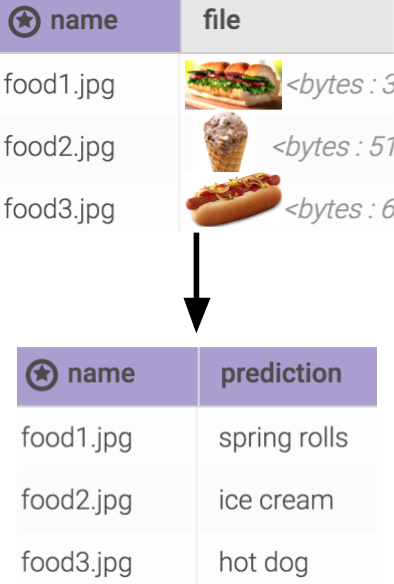
In this blog, we’ll go through the process of registering and running a trained image classification model in Kinetica. This is an example of operationalizing ML workloads with a GPU data engine to create a quicker path to value for work coming from an organization’s data science teams.
Download a trial of the Kinetica engine.
Model Details
The model used here is trained through transfer learning, the base model is Mobilenet. The training dataset is Food101. The model has a top-1 accuracy around 71%. In this example, the model itself is a standalone Google protobuf file. For TensorFlow, the advantage of using protobuf is that it contains both graph definition and parameter weights. In other words, you can use a single protobuf file to load the whole model graph.
Preparing the Input and Output Tables
To prepare an input table, we can use the Kinetica File System (KiFS) to create a table named foodimages and upload images through the UI. You can check out my colleague’s previous blog for details about using KiFS.
For the output table, we’ll use the following SQL to create an empty table:

Register the User-Defined Function (UDF)
Before registering the UDF, make sure: cluster→ conf→ enable_procs = true, if you’re using a GPU instance, read the “Run on GPU” instructions for setup.
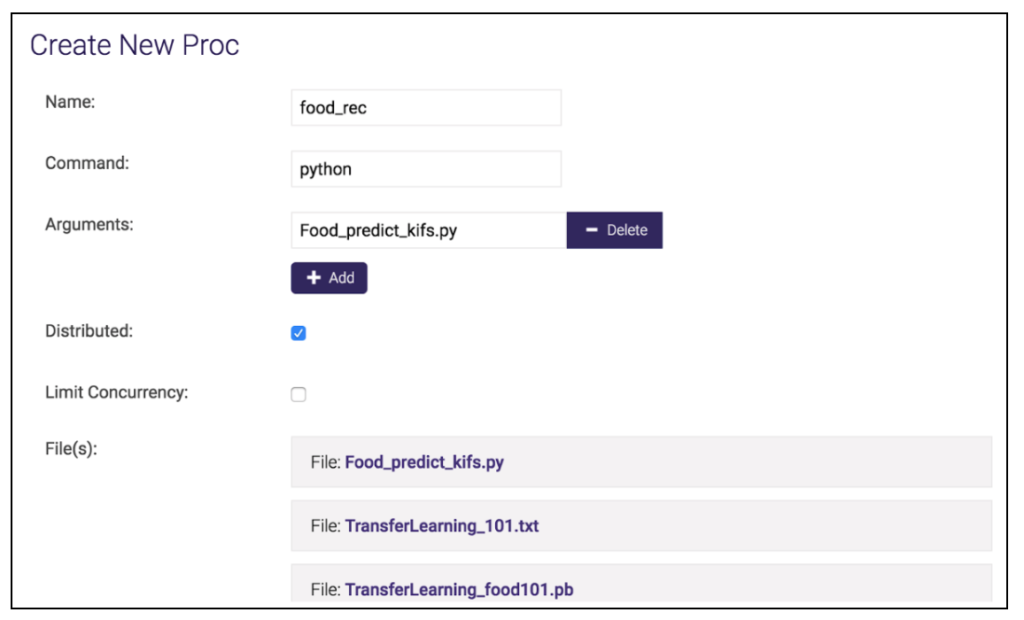
You can use the UI to register UDF as following:
Name: foodrec
Command: python
Arguments: Food_predict_kifs.py
Distributed: yes
Files: food101.pb, food101.txt, Food_predict_kifs.py
Execute UDF
Using the UI, go to UDF→ UDF. Select foodrec, click the execute button, specify input table = foodimages, output table = foodclassification, then click the execute button in the small window.

UDF details
Now let’s take a look at the UDF itself. There are three files we registered:
Food101.pb: Tensorflow model in protobuf format.
Food101.txt: Contains all the class names, in this example, food names.
Food_predict_kifs.py: UDF code.
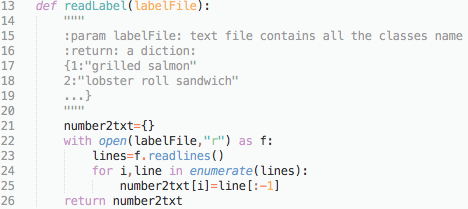
For the UDF code, function readLabel is used to read the Food101.txt file into a python dictionary object like {0:”apple pie”, 1:”baby back ribs”…}.
The function load_graph loads the protobuf object into a tensorflow default graph. The input tensor name is ‘Placeholder:0’ with shape [none, 224,224,3]. This allows a batch of images with width=224, height=224, channel number=3. The output tensor name is ‘final_result:0’ with shape [none, 101].

As the general images may have arbitrary width and height instead of 224×224, we need to get a tensorflow subgraph to do the transform. The function transform builds a subgraph which takes in an image in binary bytes with any width and height and transforms it to 224×224.

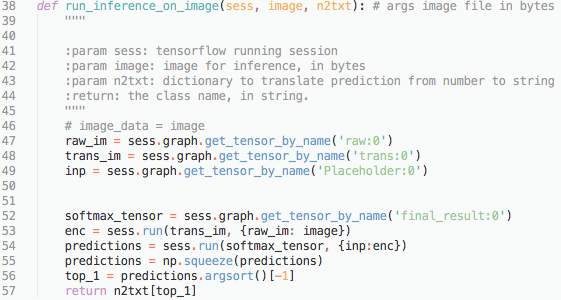
The function run_inference_on_image takes in an image in bytes and outputs the class index number. For example, if the prediction is baby back ribs, the returned number will be 1.
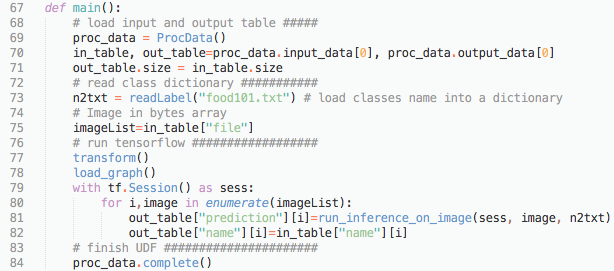
All the four functions above are standalone modules. It can be used outside Kinetica for testing. The main function below contains the pipeline to load data from Kinetica database and write it back to the database. In every UDF, proc_data = ProcData() needs to be called before loading input data and proc_data.complete() needs to be called after writing output data into output table. Note here we use a for loop to go through each image. This design is to make sure it can run from a very small Kinetica instance (for example, the CPU version on a laptop) to a large cluster without incurring an “out of memory” error. It’s very straightforward to switch to batch mode instead of using the for loop.
Run on GPU
This UDF runs on CPU by default so if you’re running Kinetica on GPUs like most of our users, you’ll need to do some extra steps to get it set up.
Shutdown Kinetica, modify Cluster→ conf:
enable_procs = true
enable_gpu_allocator = false
Modify Food_predict_kifs.py:
By default, this UDF only runs on CPU, from line 7:
os.environ[“CUDA_VISIBLE_DEVICES”]=””
To modify it to use certain GPUs (for example, GPU with index 0):
os.environ[“CUDA_VISIBLE_DEVICES”]=”0″
If your cluster has multiple nodes, and each node has multiple GPU cards, this will force every UDF to use its number 0 GPU card on its node.
If all the GPU cards are available, you can set it as following:
os.environ[‘CUDA_VISIBLE_DEVICES’] = str(int(proc_data.request_info[“rank_number”]) – 1)
This way each TOM will use the GPU that’s attached to its own rank.
Another thing to note is: by default TensorFlow will try to grab all the GPU for each session, this can easily cause an CUDA “out of memory” error. To avoid it we need the following:
![]()
This won’t be effective by default unless you change the following in the main function:
with tf.Session() as sess: → with tf.Session(config=gpu_options) as sess:
Conclusion
I hope this blog provided a helpful guide on registering your own model in Kinetica! The ability to run your AI and ML workloads on Kinetica alongside streaming and geospatial analytics is incredibly powerful. Keeping all of your data operations on a single engine increases time to insight and enables a wider range of users to leverage the power of your data, from business analysts to data scientists. If you have any problems or questions please leave a comment.
Additional online resources are available here:
- Get the Kinetica trial license key
- Kinetica Docker images for CPU version
- Kinetica Docker images for GPU version
Zhe Wu is a Data Scientist at Kinetica.
